依赖注入(DI)
一、构造器注入
前面已经介绍过,参考 “IOC创建对象的方式”
在beans.xml中配置 <constructor-arg> 标签
二、Set方式注入【重点】
- 依赖注入:Set注入
- 依赖:bean对象的创建依赖于容器!
- 注入:bean对象中的所有属性,由容器来注入!
实例:
1
2
3
4
5
6
7
8
9
10
11
12
13
14
15
16
| package dao;
public class Address {
private String address;
public void setAddress(String address) {
this.address = address;
}
@Override
public String toString() {
return "Address{" +
"address='" + address + '\'' +
'}';
}
}
|
1
2
3
4
5
6
7
8
9
10
11
12
13
14
15
16
17
18
19
20
21
22
23
24
25
26
27
28
29
30
31
32
33
34
35
36
37
38
39
40
41
42
43
44
45
46
47
48
49
50
51
52
53
54
55
56
57
58
59
60
| package dao;
import java.util.*;
public class Student {
private String name;
private Address address;
private String[] books;
private List<String> hobbies;
private Map<String,String> card;
private Set<String> games;
private String wife;
private Properties info;
public void setName(String name) {
this.name = name;
}
public void setAddress(Address address) {
this.address = address;
}
public void setBooks(String[] books) {
this.books = books;
}
public void setHobbies(List<String> hobbies) {
this.hobbies = hobbies;
}
public void setCard(Map<String, String> card) {
this.card = card;
}
public void setGames(Set<String> games) {
this.games = games;
}
public void setWife(String wife) {
this.wife = wife;
}
public void setInfo(Properties info) {
this.info = info;
}
@Override
public String toString() {
return "Student{" +
"name='" + name + '\'' +
", address=" + address +
", books=" + Arrays.toString(books) +
", hobbies=" + hobbies +
", card=" + card +
", games=" + games +
", wife='" + wife + '\'' +
", info=" + info +
'}';
}
}
|
1
2
3
4
5
6
7
8
9
10
11
12
13
14
15
16
17
18
19
20
21
22
23
24
25
26
27
28
29
30
31
32
33
34
35
36
37
38
39
40
41
42
43
44
45
46
47
48
49
50
51
52
53
54
55
56
57
58
| <?xml version="1.0" encoding="UTF-8"?>
<beans xmlns="http://www.springframework.org/schema/beans"
xmlns:xsi="http://www.w3.org/2001/XMLSchema-instance"
xsi:schemaLocation="http://www.springframework.org/schema/beans http://www.springframework.org/schema/beans/spring-beans.xsd">
<bean id="address" class="com.nichu.dao.Address">
<property name="address" value="蓝星种花家"/>
</bean>
<bean id="student" class="com.nichu.dao.Student">
<property name="name" value="晒太阳的猫"/>
<property name="address" ref="address"/>
<property name="books">
<array>
<value>数学</value>
<value>语文</value>
<value>英语</value>
<value>历史</value>
<value>政治</value>
</array>
</property>
<property name="hobbies">
<list>
<value>小说</value>
<value>音乐</value>
</list>
</property>
<property name="card">
<map>
<entry key="银行卡" value="34321432143214213"/>
<entry key="身份证" value="3213213213849384193249"/>
</map>
</property>
<property name="games">
<set>
<value>荣耀</value>
<value>吃鸡</value>
</set>
</property>
<property name="wife">
<null/>
</property>
<property name="info">
<props>
<prop key="身高">163</prop>
<prop key="体重">50</prop>
</props>
</property>
</bean>
</beans>
|
1
2
3
4
5
6
7
8
9
10
11
12
| import com.nichu.dao.Student;
import org.springframework.context.ApplicationContext;
import org.springframework.context.support.ClassPathXmlApplicationContext;
public class Mytest {
public static void main(String[] args) {
ApplicationContext context = new ClassPathXmlApplicationContext("beans.xml");
Student student = context.getBean("student", Student.class);
System.out.println(student);
}
}
|
三、拓展方式注入
1. c命名空间注入
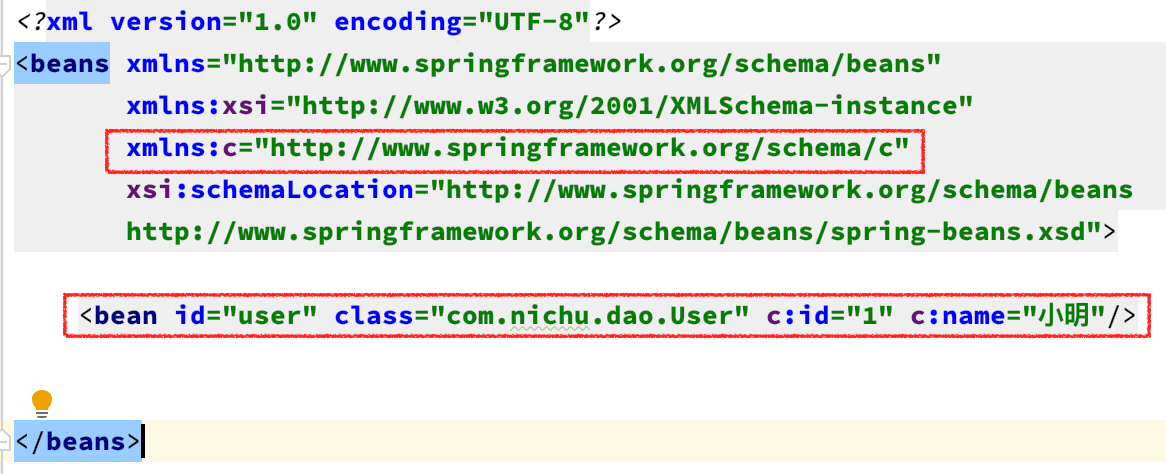
实现:c命名空间注入,通过构造器注入:constructor-args
1
2
3
4
5
6
7
8
9
10
11
12
13
14
15
16
17
18
19
| package dao;
public class User {
private int id;
private String name;
public User(int id, String name) {
this.id = id;
this.name = name;
}
@Override
public String toString() {
return "User{" +
"id=" + id +
", name='" + name + '\'' +
'}';
}
}
|

1
2
3
4
5
6
7
8
9
10
11
| <?xml version="1.0" encoding="UTF-8"?>
<beans xmlns="http://www.springframework.org/schema/beans"
xmlns:xsi="http://www.w3.org/2001/XMLSchema-instance"
xmlns:c="http://www.springframework.org/schema/c"
xsi:schemaLocation="http://www.springframework.org/schema/beans
http://www.springframework.org/schema/beans/spring-beans.xsd">
<bean id="user" class="com.nichu.dao.User" c:id="1" c:name="小明"/>
</beans>
|
1
2
3
4
5
6
7
8
9
10
11
12
13
| import com.nichu.dao.Student;
import com.nichu.dao.User;
import org.springframework.context.ApplicationContext;
import org.springframework.context.support.ClassPathXmlApplicationContext;
public class Mytest {
public static void main(String[] args) {
ApplicationContext context = new ClassPathXmlApplicationContext("beans.xml");
User user = context.getBean("user", User.class);
System.out.println(user);
}
}
|
注意:
2. p命名空间注入
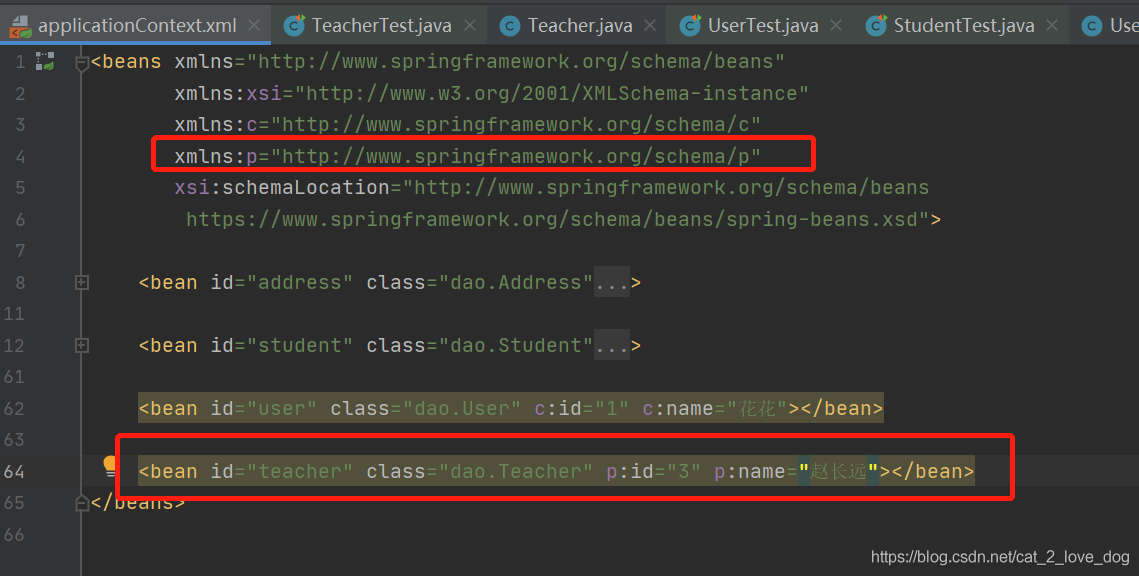
实现:p命名空间注入,可以直接注入属性的值:property
1
2
3
4
5
6
7
8
9
10
11
12
13
14
15
16
17
18
19
20
21
22
| package dao;
public class Teacher {
private int id;
private String name;
public void setId(int id) {
this.id = id;
}
public void setName(String name) {
this.name = name;
}
@Override
public String toString() {
return "Teacher{" +
"id=" + id +
", name='" + name + '\'' +
'}';
}
}
|
在beans.xml配置文件中添加红框内的代码

1
2
3
4
5
6
7
8
9
| <beans xmlns="http://www.springframework.org/schema/beans"
xmlns:xsi="http://www.w3.org/2001/XMLSchema-instance"
xmlns:c="http://www.springframework.org/schema/c"
xmlns:p="http://www.springframework.org/schema/p"
xsi:schemaLocation="http://www.springframework.org/schema/beans
https://www.springframework.org/schema/beans/spring-beans.xsd">
<bean id="teacher" class="dao.Teacher" p:id="3" p:name="赵长远"></bean>
</beans>
|
1
2
3
4
5
6
7
8
9
10
11
12
13
14
| package dao;
import org.junit.Test;
import org.springframework.context.ApplicationContext;
import org.springframework.context.support.ClassPathXmlApplicationContext;
public class TeacherTest {
@Test
public void userTest(){
ApplicationContext applicationContext = new ClassPathXmlApplicationContext("applicationContext.xml");
Teacher teacher = (Teacher) applicationContext.getBean("teacher");
System.out.println(teacher);
}
}
|
注意
四、Bean的作用域

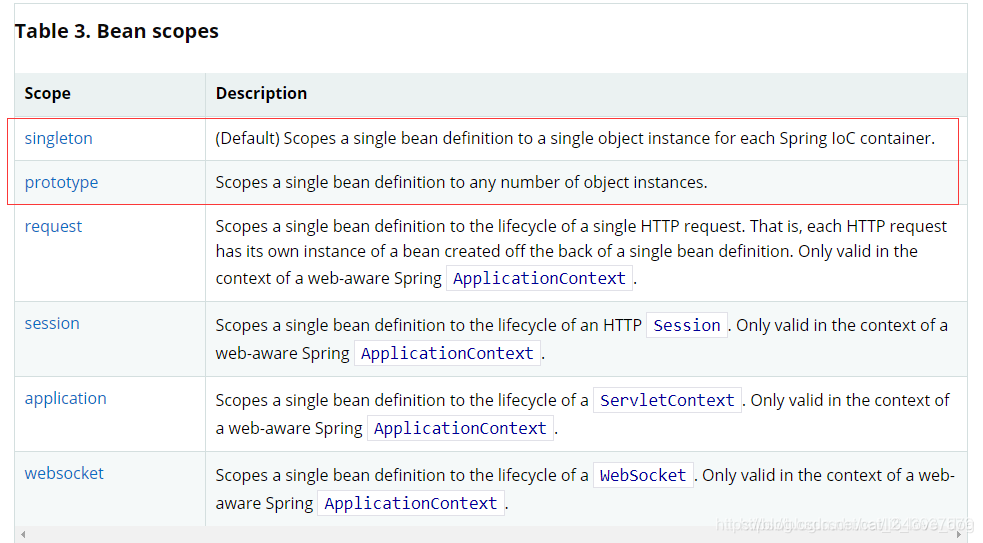
1. 单例模式(Spring默认机制)
1
| <bean id="teacher" class="dao.Teacher" p:id="3" p:name="赵" scope="singleton"></bean>
|
或者
1
| <bean id="teacher" class="dao.Teacher" p:id="3" p:name="赵"></bean>
|
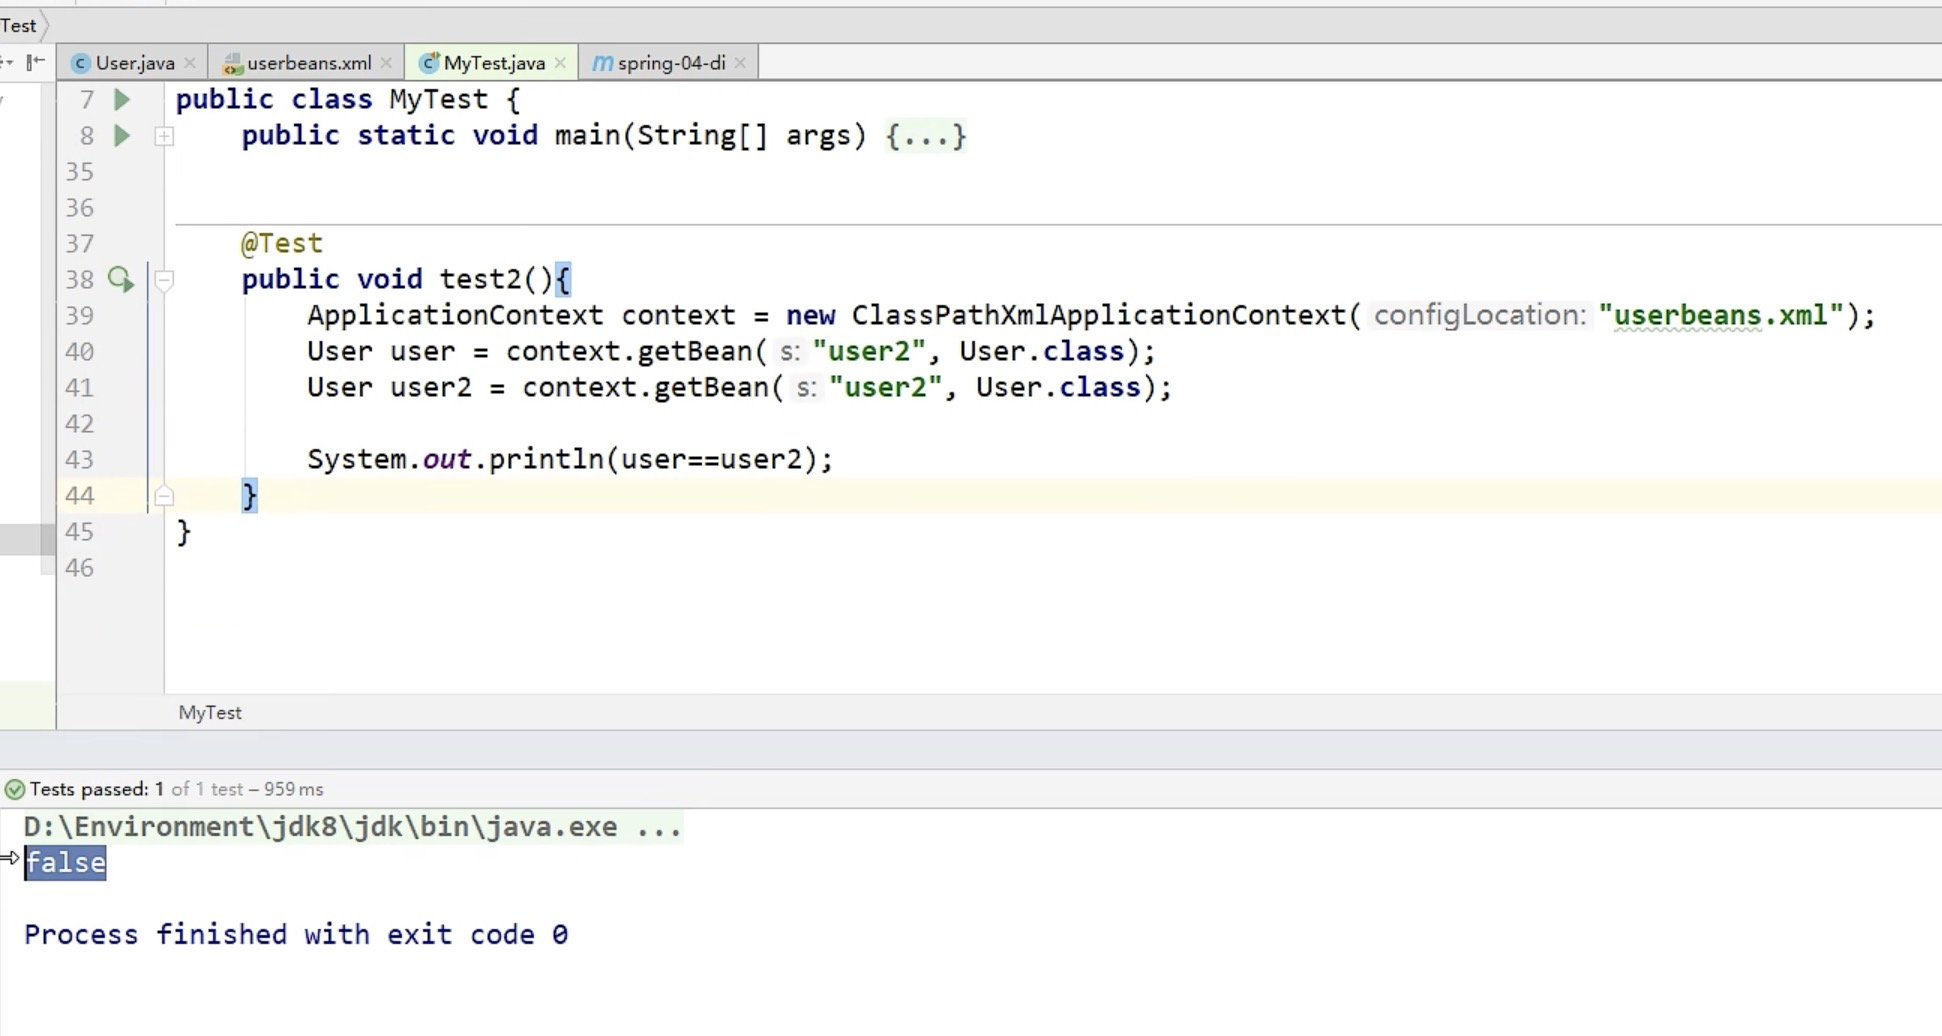
2. 原型模式
1
| <bean id="teacher" class="dao.Teacher" p:id="3" p:name="赵老师" scope="prototype"></bean>
|

3. 其他
- 其余的request、session、application、这些只能在web开发中使用到!


