iTerm2美化配置

iTerm2配置和美化
前言
近日换了新电脑,软件和环境需要重新配置,就关于iTerm2的配置和美化整理一份文章出来,方便自己之后的工作。
一、安装iTerm2
首先,下载iTerm2来替换默认终端。
什么是iTerm2?
iTerm2 is a replacement for Terminal and the successor to iTerm. It works on Macs with macOS 10.12 or newer. iTerm2 brings the terminal into the modern age with features you never knew you always wanted.
iTerm2是默认终端的替代品,也是目前Mac系统下最好用的 终端工具 ,集颜值和效率于一身。
配置iTerm2主题配色
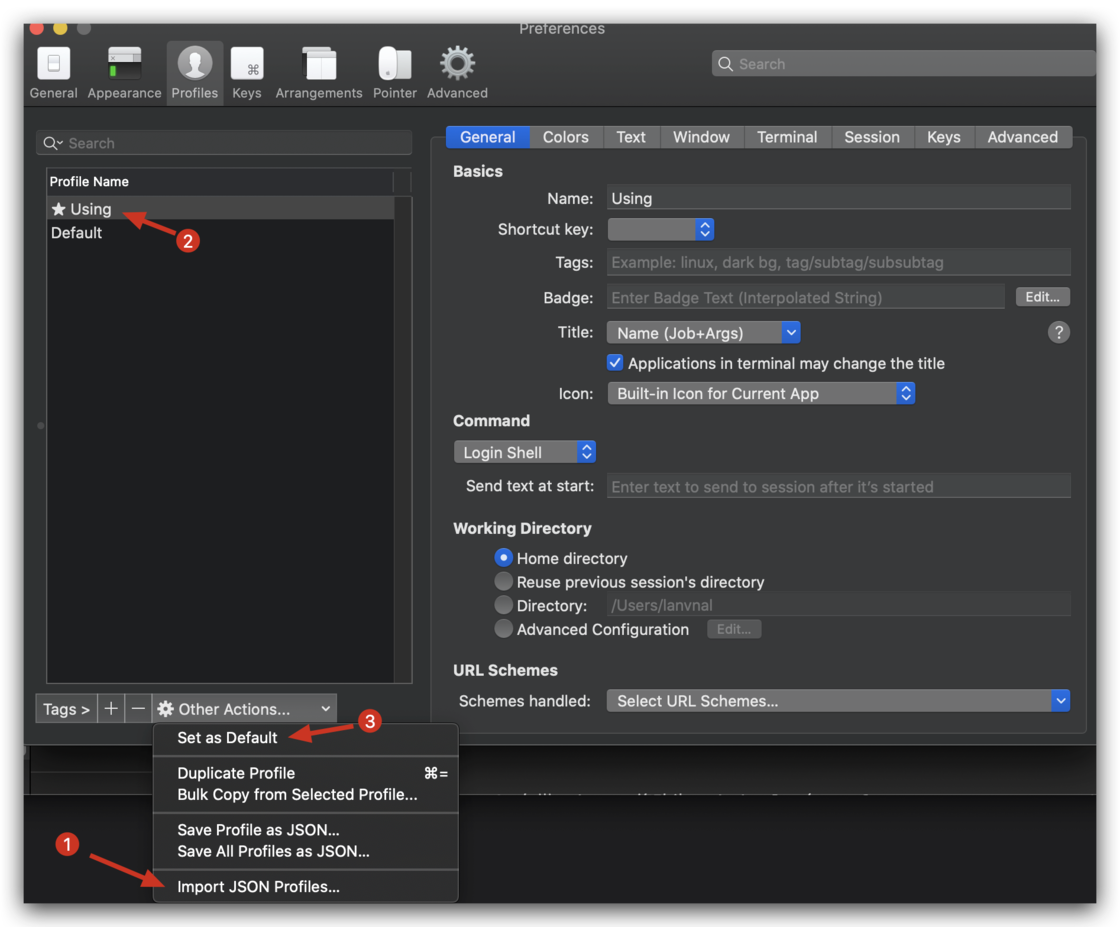
由于我已经配置好了iTerm2的配置文件,所以只需要在iTerm2中导入配置文件即可。下载所需要的配置文件:
1 | git clone https://github.com/Haikez/iTerm2Config.git |
然后在新电脑中导入:
如下图 import JSON Profiles,然后设置为默认配置。

二、安装brew包管理器
HomeBrew简介
我们在使用Linux系统的时候,都很喜欢 (Debian/Ubuntu)系列的apt包管理系统和(Redhat/Fedora)系列的yum包管理系统。Mac OS X系统下面有apple的官方Mac App Store。但是好多软件是找不到的,所以我们也向在苹果下找到一款比较方便的包管理系统,就是Homebrew。什么是Homebrew呢?Homebrew is the easiest and most flexible way to install the UNIX tools Apple didn’t include with OS X. 官方的解释非常明了,Homebrew是一个包管理器,用于在Mac上安装一些OS X没有的UNIX工具(比如著名的wget),能在Mac中方便的安装软件或者卸载软件,可以说Homebrew就是mac下的apt-get、yum神器。
安装HomeBrew
终端输入
1 | /bin/zsh -c "$(curl -fsSL https://gitee.com/Haikez/HomebrewCN/raw/master/Homebrew.sh)" |
Homebrew的安装目录为:/opt/homebrew/Cellar
安装zsh(Mac下应该自带)
1 | brew install zsh |
三、设置Oh-My-Zsh
什么是Oh-My-Zsh?
Oh My Zsh是一款社区驱动的命令行工具,它基于zsh命令行,提供了主题配置,插件机制,大大提高了可玩(用)性。提升使用效率还能使人愉快hhh
Oh My Zsh is a delightful, open source, community-driven framework for managing your Zsh configuration. It comes bundled with thousands of helpful functions, helpers, plugins, themes, and a few things that make you shout…
安装Oh-My-Zsh
使用国内源安装,在终端下输入命令:
1 | 1.使用 curl 安装 |
配置Oh-My-Zsh的一些常用的插件
将下载的配置文件夹中的 .zshrc 移动到宿主目录 ~
1 | mv ~/.zshrc .zshrc_bak && mv iTerm2Config/.zshrc . |
1、安装命令自动补全插件
克隆项目到本地 $ZSH_CUSTOM/plugins 路径下默认是 ~/.oh-my-zsh/custom/plugins
1 | git clone https://github.com/zsh-users/zsh-autosuggestions ${ZSH_CUSTOM:-~/.oh-my-zsh/custom}/plugins/zsh-autosuggestions |
2、配置语法高亮显示
安装方法:
推荐使用HomeBrew进行安装:
brew安装:
1 | brew install zsh-syntax-highlighting |
3、配置autojump
效果:实现目录间快速跳转,想去哪个目录直接 j + 目录名(甚至不用输全),不用在频繁的 cd了项目地址:https://github.com/wting/autojump
安装方法:
brew安装:
1 | brew install autojump |
安装Nerdfont字体
1. 直接到官网中下载字体
官网:
https://www.nerdfonts.com/

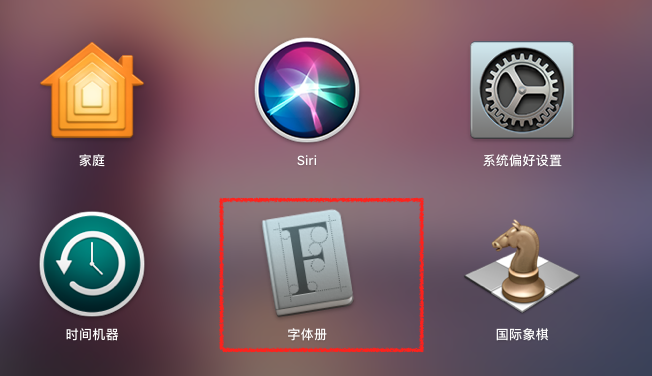
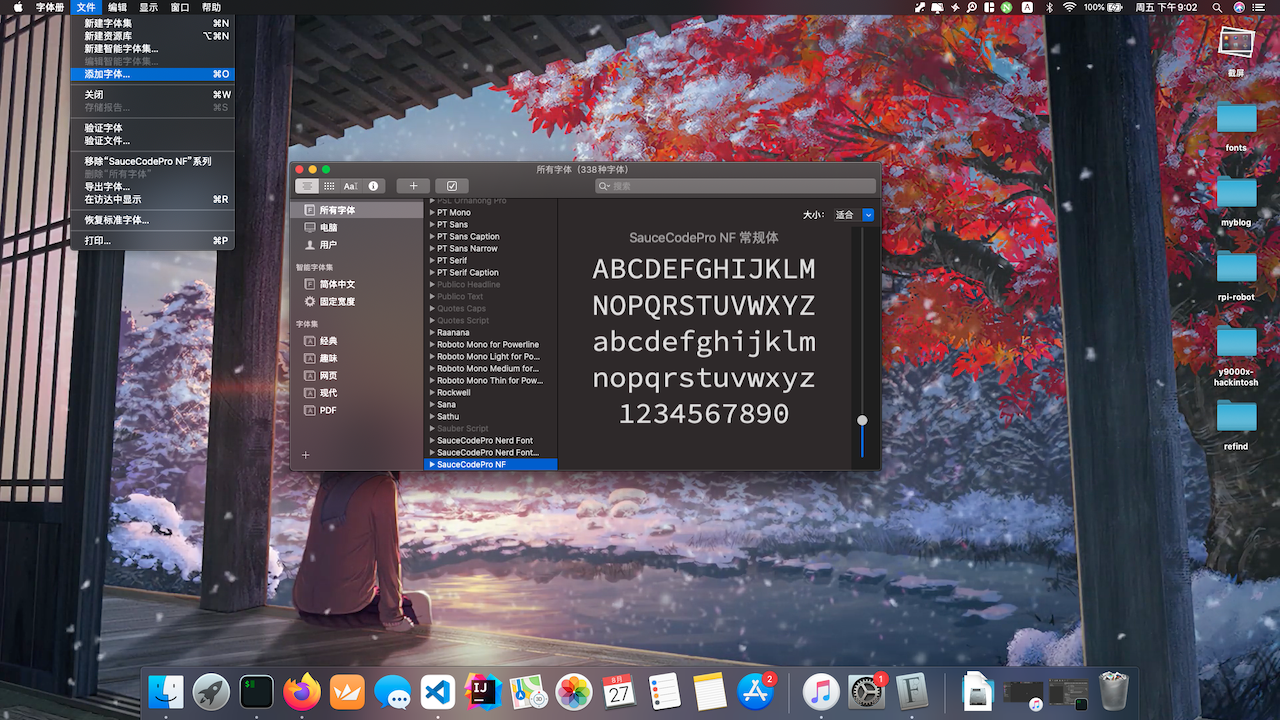
2. 使用Mac自带的字体册将字体添加到系统中


安装Oh-My-Zsh主题
1.安装 P10k主题
1 | git clone --depth=1 https://github.com/romkatv/powerlevel10k.git ${ZSH_CUSTOM:-$HOME/.oh-my-zsh/custom}/themes/powerlevel10k |
Gitee 镜像
1 | git clone --depth=1 https://gitee.com/romkatv/powerlevel10k.git ${ZSH_CUSTOM:-$HOME/.oh-my-zsh/custom}/themes/powerlevel10k |
2.在 ~/.zshrc 中设置 ZSH_THEME
1 | ZSH_THEME="powerlevel10k/powerlevel10k" |
3.重启命令行
4.设置 P10k
手动设置:
1 | p10k configure |